An electric bike wiring diagram is a detailed blueprint outlining the connections between components like batteries, motors, and controllers. It provides a clear visual representation of the electrical system, essential for installation, troubleshooting, and maintenance. These diagrams are crucial for understanding how power flows through the bike, ensuring safety and optimal performance. Whether you’re a DIY enthusiast or a professional, a wiring diagram is your guide to mastering e-bike circuitry.
1.1 Overview of Electric Bike Components
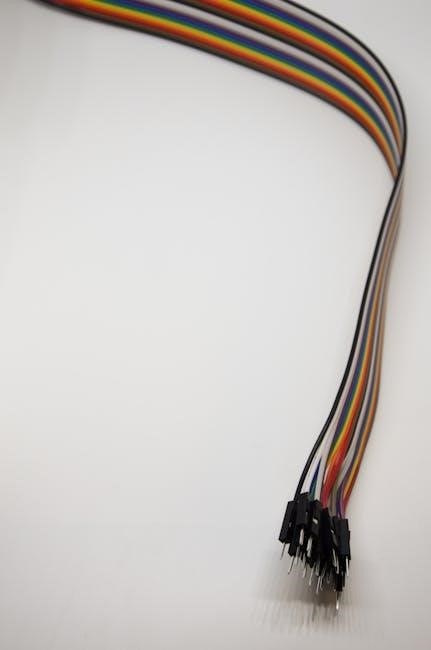
An electric bike’s wiring system includes a battery, motor, controller, throttle, sensors, and accessories. The battery powers the motor, while the controller regulates energy flow. Sensors monitor speed and pedal assist, and accessories like lights enhance functionality. Understanding these components is essential for interpreting wiring diagrams and ensuring proper connections for optimal performance and safety.
1.2 Importance of Wiring Diagrams for E-Bikes
A wiring diagram serves as a blueprint for an e-bike’s electrical system, guiding connections between components like batteries, motors, and controllers. It aids in troubleshooting, ensures safety, and simplifies maintenance. Whether for DIY repairs or professional setups, a wiring diagram is indispensable for understanding and managing the bike’s circuitry effectively.

Key Components of an Electric Bike Wiring System
The system includes a battery, motor, controller, and accessories like lights and displays; These components are connected through wires, ensuring power distribution and communication for optimal e-bike functionality.
2.1 Battery and Motor Connections
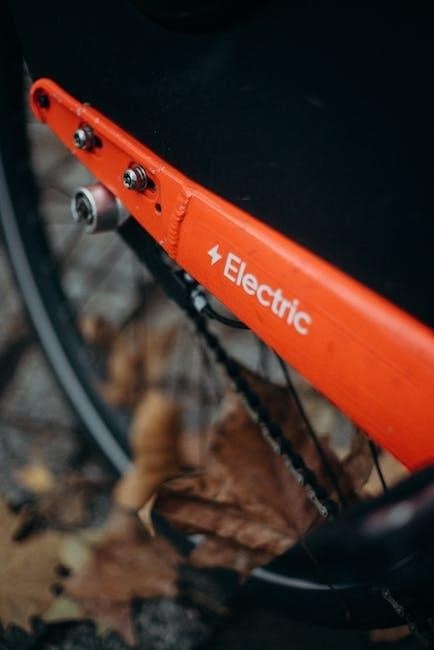
The battery connects to the motor via thick-gauge wires, ensuring high power transfer. A fuse is installed on the positive wire for safety. Secure connections are crucial to prevent power loss and overheating, ensuring efficient energy flow from the battery to the motor for smooth operation.
2.2 Controller and Throttle Wiring
The controller acts as the central processing unit, managing power distribution between the battery and motor. The throttle, typically connected via a JST connector, sends speed signals to the controller. Proper wiring ensures smooth acceleration and secure communication between components, essential for safe and efficient e-bike operation.
2.3 Brake Levers and Sensors
Brake levers are connected to sensors that signal the motor to reduce power when braking, enhancing safety. Proper wiring ensures these sensors communicate effectively with the controller, preventing accidental acceleration. Common connectors like JST or similar are used for secure, low-current signal transmission, ensuring reliable operation of this critical safety feature.
2.4 LED Display and Accessories
The LED display connects to the controller to show speed, battery level, and assist mode. Accessories like lights and horns are wired through the controller using low-current connectors such as JST. Proper wiring ensures all components function seamlessly, with the diagram guiding connections for reliable operation and easy troubleshooting of any issues that arise.
Understanding the Wiring Diagram
A wiring diagram visually maps all electrical connections, ensuring components like the battery, motor, and controller link properly. It uses color-coded wires and universal symbols for clarity, helping users understand the circuitry and troubleshoot issues efficiently.
3.1 Visual Representation of Connections
A wiring diagram provides a clear visual representation of electrical connections, using color-coded wires and symbols to depict components. This layout simplifies understanding how the battery, motor, controller, and accessories interact, ensuring proper installation and troubleshooting. It serves as a blueprint for diagnosing and resolving electrical issues efficiently.
3.2 Color Coding and Wire Identification
Color coding is essential for identifying wires in an electric bike wiring diagram. Common colors like red (positive), black (negative), yellow (ignition), and green (ground) help differentiate functions. This standardized system ensures consistency, reducing the risk of short circuits and simplifying repairs. Always refer to the diagram for accurate wire identification and connections.
3.3 Common Symbols and Notations
Electric bike wiring diagrams use standardized symbols to represent components like batteries, motors, and controllers. A battery is often shown as parallel lines, while a motor may appear as a circle with internal lines. Ground symbols, like triangles, indicate connections to the frame. These notations ensure universal understanding and precise wiring.
Safety Considerations and Precautions
Always prioritize safety when working with electric bike wiring. Use insulated tools, ensure proper insulation of wires, and avoid overloading circuits to prevent short circuits and fires.
4.1 Handling Electrical Components Safely
Always handle electrical components with care. Use insulated tools to prevent shocks, ensure all components are properly insulated, and avoid overloading circuits. Disconnect the battery before working on the wiring to eliminate power risks. Proper safety measures ensure a secure working environment and prevent potential hazards.

4.2 Proper Use of Tools and Materials
Use wire cutters, strippers, and crimpers for precise connections. High-quality materials like heat shrink tubing and electrical tape ensure durability. Always follow the wiring diagram to avoid errors. Proper tool usage and material selection prevent short circuits and ensure safe, reliable electrical connections in your e-bike system.
4.3 Avoiding Short Circuits and Fire Hazards
To prevent short circuits and fire risks, ensure all connections are secure and insulated. Use high-quality connectors and fuses to protect the circuit. Regularly inspect wires for damage or wear. Proper insulation and secure connections are crucial to avoid electrical failures and potential fires in your e-bike’s wiring system.
Common Mistakes to Avoid
Common mistakes include incorrect wire connections, overlooking fuse installation, and improper grounding. These errors can lead to electrical failures, safety hazards, or component damage, so attention to detail is crucial when following a wiring diagram.
5.1 Incorrect Wire Connections
Incorrect wire connections are a common mistake that can lead to short circuits, component damage, or electrical failures. Always refer to the wiring diagram to ensure proper connections. Mismatched wires, especially between the battery, motor, and controller, can cause severe issues. Double-check connections before powering on the bike to avoid safety hazards and ensure reliable performance.
5.2 Overlooking Fuse Installation
Overlooking fuse installation is a critical error that can lead to uncontrolled current flow, risking component damage or fire. Always install a fuse on the positive battery wire to protect against short circuits. Consult the wiring diagram to determine the correct fuse rating and placement, ensuring your e-bike’s electrical system remains safe and reliable.
5.3 Improper Grounding Techniques
Improper grounding can cause electrical noise, erratic behavior, or even component failure. Always ensure a clean, direct ground connection between the battery, controller, and motor. Verify connector types like JST, XT60, or Anderson Powerpole are securely fastened. Consult the wiring diagram to confirm proper grounding techniques for a safe and reliable e-bike system.
Tools and Materials Needed
Essential tools include a multimeter, wire cutters, strippers, and a soldering iron. Materials like 10-14 AWG wires, heat shrink tubing, electrical tape, and fuses are fundamental for a reliable setup.
6.1 Essential Tools for Wiring
Key tools include wire cutters, strippers, a multimeter, and a soldering iron. Heat shrink tubing, connectors (JST, XT60, Anderson), and crimping tools are vital for secure connections. Safety gear like gloves and goggles is also essential to protect against electrical hazards and ensure precise, damage-free wiring.
6.2 Recommended Materials for Connections
Use high-quality wires, connectors (JST, XT60, Anderson), and heat shrink tubing for insulation. Fuse holders, inline fuses, and adhesive-lined connectors ensure reliability. Electrical tape or epoxy can seal connections. Choose 10-14 gauge wires for optimal current flow. High-quality terminals and solder are essential for durable, secure connections that withstand mechanical stress and environmental factors.
Step-by-Step Installation Guide
This guide provides a clear process for installing your e-bike’s wiring system. Start by connecting the battery to the controller, then link the motor and throttle. Use JST or XT60 connectors for secure, high-current connections. Always test each connection before proceeding to ensure functionality and safety.
7.1 Connecting the Battery to the Controller
Connect the battery to the controller by matching the positive (red) and negative (black) wires. Use high-current connectors like XT60 for secure connections. Always install a fuse (e.g., 30A) on the positive wire to prevent short circuits. Ensure wires are properly secured to avoid damage. Test connections with a multimeter before use.
7.2 Wiring the Motor and Brake System
Connect the motor to the controller’s motor terminals, ensuring correct phase and hall sensor wiring. Install brake levers with sensors, linking them to the controller’s brake inputs. Use durable connectors for motor wires. Secure all connections and test brakes to ensure proper function and safety before riding the e-bike.
7.3 Integrating the Throttle and Display
Connect the throttle to the controller’s designated throttle port. Mount the LED display securely and link it to the controller’s display output. Ensure proper wiring for power, speed, and assist mode indicators. Test throttle responsiveness and display functionality to confirm seamless integration and accurate performance monitoring for a smooth e-bike operation.
7.4 Finalizing Connections and Testing
Once all components are connected, double-check every wire for secure fastening and correct routing. Power on the system and test each function, including the throttle, brakes, and display. Ensure the motor responds smoothly and all lights indicate proper operation. Verify battery voltage and current flow for safety and performance. Conduct a test ride to confirm everything works flawlessly.
Integrating Accessories and Customizations
Accessories like lights and horns can be seamlessly integrated into your e-bike’s wiring system. Customization options allow you to tailor the setup to meet specific riding needs effectively.
8.1 Adding Lights and Horn
Adding lights and a horn enhances safety and visibility. Refer to the wiring diagram to connect these accessories to the controller or battery, ensuring proper power distribution. Use appropriate connectors and follow safety guidelines to avoid short circuits. These additions improve functionality while maintaining the bike’s electrical integrity and performance.
8.2 Installing Additional Sensors
Installing additional sensors, such as speed, cadence, or torque sensors, enhances your e-bike’s functionality. Refer to the wiring diagram to identify appropriate connection points, typically using JST or similar connectors. Ensure proper installation to avoid electrical interference and test thoroughly after setup for optimal performance.
8.3 Customizing the Wiring for Specific Needs
Customizing the wiring for specific needs allows you to tailor your e-bike’s electrical system. Use the wiring diagram to identify compatible components and connections. Modify circuits carefully, ensuring all added accessories like lights or horns are integrated safely. Proper customization enhances functionality without compromising safety or performance, providing a personalized riding experience.

Troubleshooting Common Issues
Troubleshooting common issues with your electric bike’s wiring ensures optimal performance and safety. Identify faulty connections, diagnose power problems, and repair or replace components using the wiring diagram. Always check connections and ensure proper power flow for reliable operation.
9.1 Identifying and Repairing Faulty Connections
Identifying faulty connections in your electric bike’s wiring system is crucial for maintaining performance. Use the wiring diagram to locate loose or corroded wires, and inspect connectors like JST, XT60, and Anderson Powerpole. Repair or replace damaged wires and ensure secure connections to prevent power interruptions and ensure safe operation. Regular checks can prevent major issues.
9.2 Diagnosing Power Issues
Diagnosing power issues in your electric bike involves checking the battery, connectors, and controller. Start by ensuring the battery is fully charged and connections are secure. Use a multimeter to test voltage and continuity in critical circuits. Consult the wiring diagram to trace power flow and identify potential faults. Replace any damaged or malfunctioning components to restore functionality.
9.3 Resetting or Replacing Components
If a component fails, refer to the wiring diagram to identify its location and connections. Reset devices like the controller or battery management system according to the manufacturer’s instructions. For damaged parts, disconnect power, remove the faulty component, and install a replacement, ensuring proper connections to maintain system integrity and safety.

Maintenance and Upkeep
Regularly inspect wiring harnesses and connections for wear or corrosion. Clean terminals and ensure all components are securely fastened. Refer to the wiring diagram for guidance on performing routine checks and preventive maintenance to ensure your e-bike operates safely and efficiently.
10.1 Regular Inspection of Wiring
Conduct routine checks of the wiring system using the e-bike wiring diagram. Inspect for frayed cables, loose connections, and corrosion. Ensure all components like the battery, motor, and controller are securely connected. Clean terminals and tighten screws to maintain optimal conductivity and prevent electrical failures during operation. Regular inspections ensure reliability and safety on the road.
10.2 Cleaning and Protecting Connections
Regularly clean and protect electrical connections to maintain reliability. Use a soft cloth to wipe away dirt and moisture. Avoid harsh chemicals that could damage components. Apply a light layer of protective spray or grease to terminals to prevent corrosion. This ensures optimal conductivity and safeguards against environmental wear, prolonging the system’s lifespan and efficiency.
10.3 Updating or Replacing Wires
Inspect wires regularly for signs of wear, fraying, or damage. Replace any compromised wires with high-quality alternatives, ensuring they match the original specifications. Use the wiring diagram to identify the correct connections. Proper replacement ensures safety and prevents electrical failures, maintaining your e-bike’s performance and reliability over time.
Electric bike wiring diagrams are essential tools for safe and efficient installations. By following these guides, you ensure optimal performance and longevity of your e-bike’s electrical system. Embrace DIY projects with confidence, knowing you have the resources to succeed and maintain your electric bicycle effectively.
11.1 Summary of Key Points
Electric bike wiring diagrams are essential for understanding component connections and ensuring safe installations. They provide clarity on battery, motor, and controller linkages, aiding in troubleshooting and maintenance. By following these diagrams, users can identify issues, perform repairs, and ensure their e-bike operates efficiently and safely, making them a crucial resource for all e-bike enthusiasts.
11.2 Encouragement for DIY Enthusiasts
Electric bike wiring diagrams empower DIY enthusiasts to tackle complex tasks with confidence. They provide a clear path for installations, ensuring safety and efficiency. With these guides, even the most daunting projects become achievable, fostering a sense of accomplishment and pride in your work. Embrace the journey and enjoy the ride!